Moro River, The Gully and Casa Berardi

This is my eighth post on the 2016 Liberation Tours visit to Italy in the fall of that year. You can find the first seven on the Maritime Explorer website. It will be the first of two posts on the fighting that took place in and around the small Italian coastal town of Ortona on the Adriatic. This post will describe the background and our visits to the battle sites at the Moro River – Sterlin Castle, Cider Crossroads, The Gully and lastly Casa Berardi where we won our first Victoria Cross of the Italian campaign. In the next post we will visit the modern day town of Ortona and try to imagine the horrendous house to house combat that occurred there during the Christmas season of 1943.
Chronologically on the tour, we visited the Liri Valley war sites centred around Montecassino before crossing the Appenines to Ortona. However, as the Ortona fighting preceded that of the Canadians at Montecassino, I have decided to write about the Ortona battles first.
There is a lot of good information about the Canadian Army’s role at Ortona on the web. In particular these sites – Canadiansoldiers.com and Canadian armed forces . However, if you really want a detailed account of events leading up to and the battles in and around Ortona then you need to read Ortona by Mark Zuelke.
Mark, a winner of the Pierre Berton award for popular media, has written well over a dozen books on Canadian military history and he just happens to be along as the official historian on this Liberation Tours trip. It never hurts to have the guy who literally, ‘wrote the book’ on board. You can buy Mark’s books online or download an audible version from Audible.com which is what Alison and I did in preparation for this trip. Having now visited the places we learned of in the book I have enjoyed going back and relistening to it with a much clearer insight. Hopefully that will come through in these two posts.
From Sicily to the Moro River
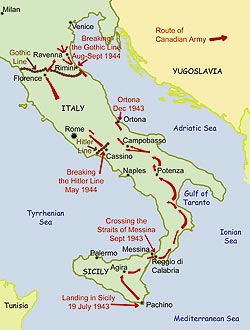
When we last left the Canadian forces they had just participated in the liberation of Sicily ending on August 17, 1943. On September 3, Field Marshall Bernard Montgomery led his 8th army, which included the 1st Canadian Division and the 1st Canadian Tank Brigade, across the Straits of Messina and the invasion of the Italian mainland began. On the same day, the Italian government which had ousted Benito Mussolini on July 25, surrendered, although it was not publicly announced until the 8th. Not surprisingly, this lead to much less resistance than encountered in Sicily as the Italians laid down their arms. The Germans were not about to cede Italy that easily and rapidly began to occupy the fortified positions abandoned by their erstwhile allies. Still, in the chaos that followed, it allowed the 8th army to advance first along the southern coast and then follow the Appenines north along the spine of southern Italy. This map illustrates the movement of the Canadian forces after landing on mainland Italy.
Canadians were responsible for the capture of the important crossroads centre of Potenza on September 19th where the West Novas and the Van Doos received Battle Honours. This picture gives an idea of the rugged terrain found in central Italy. It was to become as much an enemy to the Allies as the German troops.

Next up was the town of Campobasso which had been the headquarters of Field Marshall Albert Kesselring, Axis commander in Italy. This map shows just how many Canadian units were engaged in the fighting. The town fell on October 14 and the Royal Canadian Regiment, the Hasty P’s and the 48th Highlanders all received battle honours.
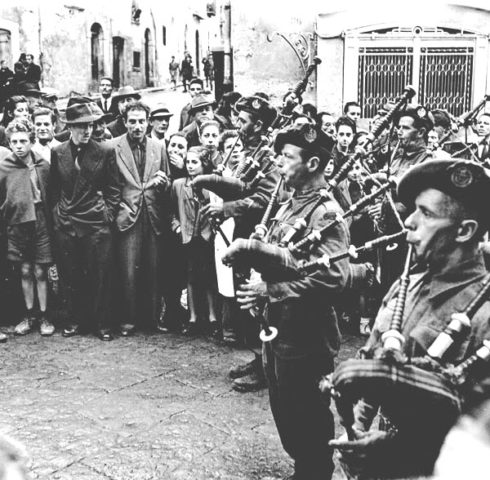
Campobasso then became a staging point for the Canadian army and soon earned the moniker ‘Maple Leaf City’. Here is a picture of the 48th Highlanders playing to a somewhat confused looking local audience.
By now, the German strategy for defending Italy was becoming clearer. After the confusion of the Italian surrender and subsequent hasty replacement by German troops which allowed the Allies a relatively easy time in capturing southern Italy, the Germans had constructed a number of defensive lines that ran from the Adriatic to the Tyrrhenian Sea. This map shows five distinct lines, some with spurs off them like the Hitler and Bernhardt lines. However, it was clear to both sides that the really tough fight would be at the Gustav Line that ran from Ortona in the east to Cassino in the west. You can see it outlined in red on this map. Also note the position of Campobasso just south of the first line, the Volturno and the mountainous terrain as indicated by the yellow and brown markings on the map.
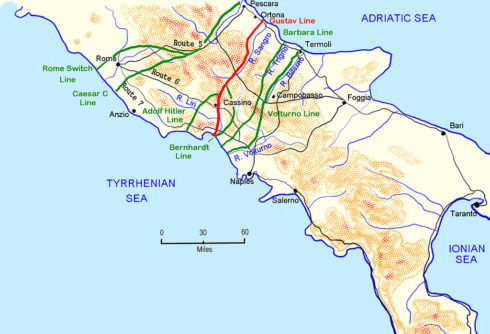
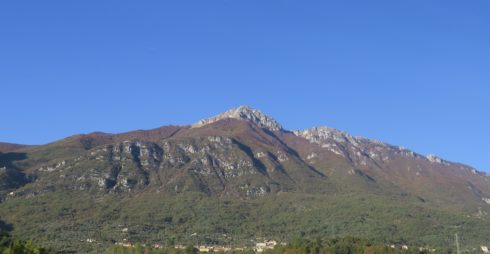
This is a view of the Appenine mountains taken from our bus as we crossed them on our way to Ortona. Referring back to the map you can see that each German line corresponds with a river valley. In the case of the Canadians at Campobasso, they needed to cross the Biferno, Trigno and Sangro Rivers before they even got to Ortona.
Actually, the Biferno River had been crossed as early as October 3 near its mouth and Canadian and British forces had successfully repulsed a German counterattack and tanks and artillery were pouring over bailey bridges towards the next line, the Barbara. This was reached in early November and the Germans put up a fierce, but short resistance before withdrawing across the Sangro River to the Gustav Line where they expected to hold the Allies off over the winter. Most of the Allied soldiers also thought that after fighting almost continually since landing in Sicily in June, they would get a respite. Attacks that lasted well into winter were not generally successful – just ask the Germans how they were making out in Russia. While Italy was certainly not the Russian front, rain and the mud it created, made for extremely difficult conditions to move men and equipment.
Nonetheless, the 8th Army, under the command of Field Marshall Bernard Montgomery, was ordered to push on and that meant getting across the Sangro River and right up to the Gustav Line defences. Here is a map of the Battle of the Sangro River in which Canadians led the way, flanked by the British 5th Division on one side and the 8th Indian Division on the other. Click on the link for a detailed account.
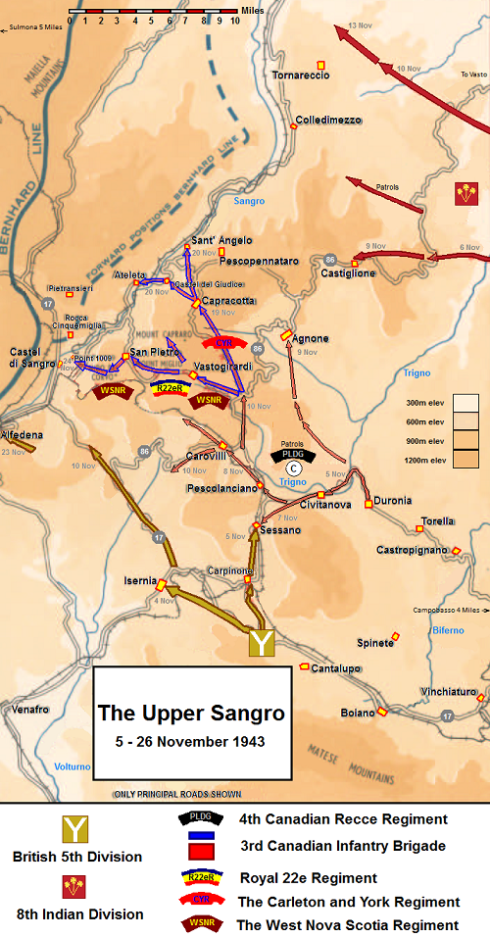
The Canadian contingent in this battle was an all eastern Canada affair with the Van Doos, West Novas and Carleton and Yorks doing the fighting. All three regiments received battle honours.
Crossing the Moro River
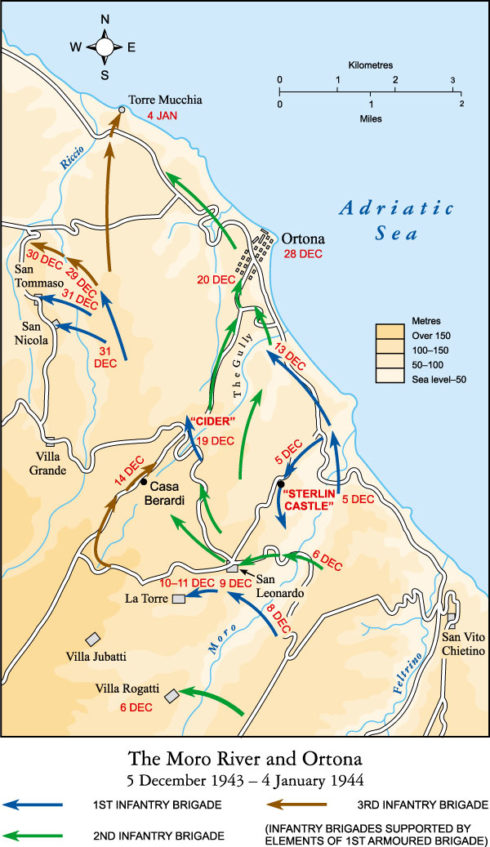
Instead of hunkering down for the winter, Montgomery decided he wanted to give the Germans a mighty ‘crack’ that would crush the Gustav line defenders and force a retreat northward. If only it had been that simple. Here is a map of the various places and dates where Canadians fought in the battles to cross the Moro River and advance on Ortona.
We arrived on the banks of the Moro River on a beautiful autumn day, only to find that the Moro River was more like a streamlet than a river. Apparently in the 80+ years since the battle, it has silted up and was a much more formidable obstacle then than it appears to be today. However, streamlet or not, there are steep banks on both sides of the river that would be serious obstacles for tanks and artillery. From this photo you are looking right at positions on the far side where the Germans were dug in.
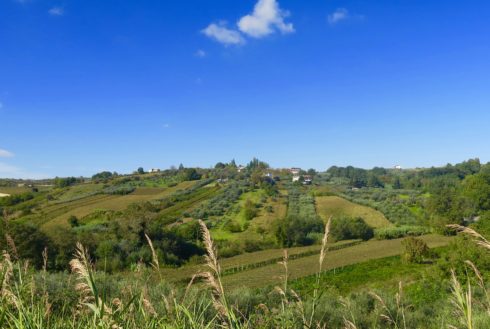
We got out of the bus on the south side of the Moro River and Mark briefed us on the battle which began with a huge artillery barrage that was described for Canadian listeners back home by CBC war correspondent Matthew Halton.
After the briefing, John Cannon, our tour director played the entire recording near the very spot from which Halton observed the action. Looking across at the peaceful green fields and olive groves of today, it was a surreal experience trying to visualize the hellish din of the bombardment. Have a listen and see if you can.
The battles leading up to the street fight in Ortona, were fought in small hamlets, in olive groves and in whatever shelter either side could find, sometimes even in apparently surprisingly comfortable surroundings. We are off to visit the first of these after crossing the Moro River and then turning inland.
Sterlin Castle
This is Sterlin Castle, not to be confused with Stirling Castle in Scotland which is a real castle.
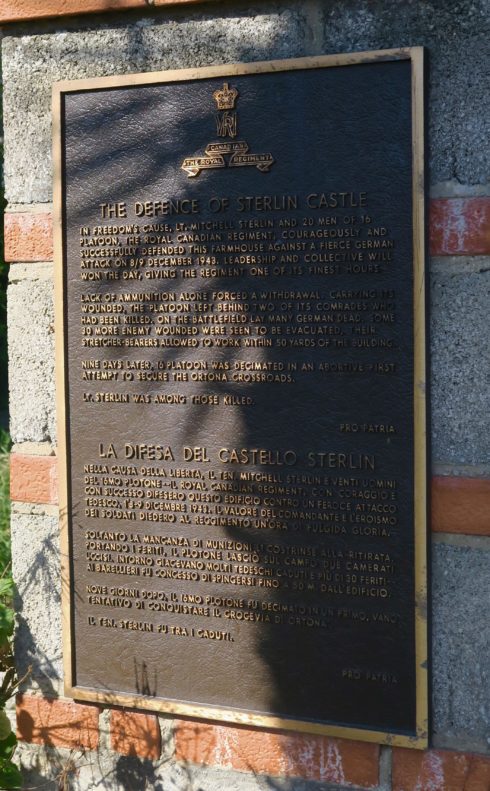
It was named for Lt. Mitch Sterlin of the Royal Canadian Regiment, a most unlikely hero. In his book Ortona, Mark Zuelke devotes a chapter to an incident that happened on this very spot. The RCRs and other units of the 1st Canadian Infantry Brigade had been successful in crossing the Moro River near its mouth in what was intended to be a diversionary tactic. The 2nd Canadian Infantry Brigade was to lead the way in the ‘real’ attack and capture the village of San Leonardo. Suffice it to say that things did not go as planned as the German resistance was ferocious and almost every piece of ground taken had to be then defended from an inevitable counter-attack. Once they crossed the Moro River, the Canadians knew they were in for the fight of their lives.
The RCRs were ordered to turn west along the road that runs from San Donato to San Leonardo to help with the efforts to capture it. They never made it that far and were pummelled by devastating artillery fire that killed two of three platoon officers and knocked out communication between the units. It was the type of situation that could turn even worse without proper leadership. Lt. Sterlin, a Jewish kid from Montreal, had always been the most inept and clumsy officer in the regiment and according to Mark, maintained discipline by being good natured and easy going. Finding himself the officer in charge, Lt. Sterlin directed his remaining troops into the deserted farmhouse you see pictured above. There, for what must have seemed an eternity, Sterlin and his little band of men fought off attack after attack by seemingly crazed Germans who battled their way right up to the walls of the farmhouse only to be shot at point blank range. It was a Canadian version of the Alamo, but this time the defenders won. When the Germans finally retreated and sent back medical orderlies, there were over fifty dead and wounded Germans, some stacked on top of each other in their vain efforts to capture what will forever be known as Sterlin Castle.
Lt. Sterlin and his surviving men managed to slip back across the Moro River that night, but he would not survive the war. I will be visiting his grave in the next post. Today there is only this small plaque to mark the fact that this quite ordinary building was the scene of most extraordinary events.
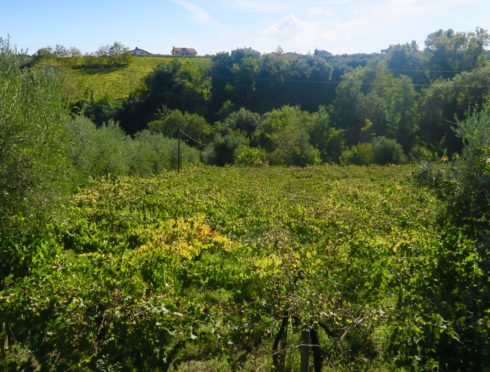
While standing on the site of Sterlin Castle, we were directed to look into the olive orchard and vineyard across the street to see why the Canadians had such a difficult time once they crossed the Moro River.
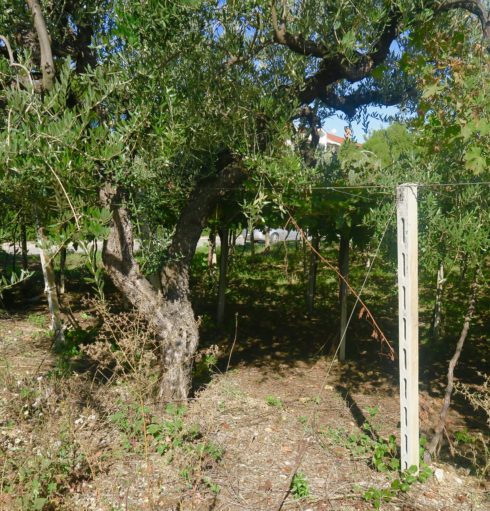
The way grapes are grown in this part of Italy involves tying them off on wires strung between concrete posts. Also, the vineyards and olive orchards tend to be side by side with a vineyard having olive trees on both sides and vice versa. Now imagine trying to drive a tank through this or walking through it at night. These were not defences the Germans created, but nonetheless were equally effective on stalling Canadian progress along the Moro River.
Cider Crossroads
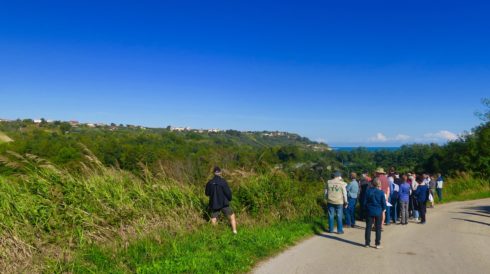
Our next stop was at Cider Crossroads which is indicated on the map above by the number 2 in a white circle. I never did find out why it’s called that, but it’s still a major crossroads only now it has this bastardized Sherman tank in the centre of the roundabout. The crossroads is on the major east west highway in the area and from the beginning of the Moro River campaign it was a strategic objective.
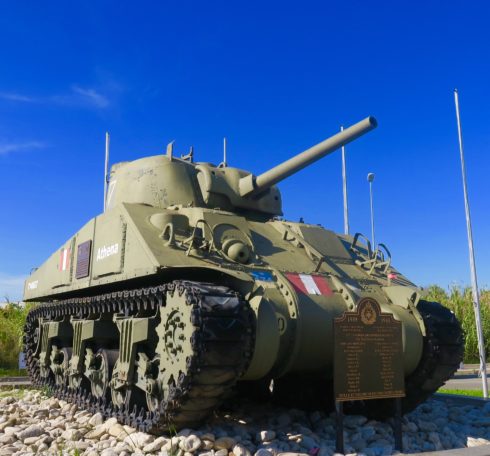
However, we are gathered at this place not because of what happened here, but because it is from here that we can get a view of the infamous Gully that became one of the worst killing grounds for Canadians in our military history.
The Gully
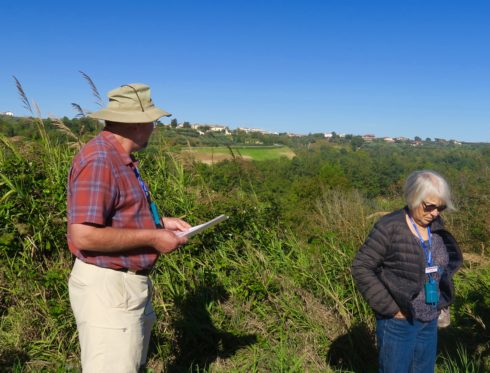
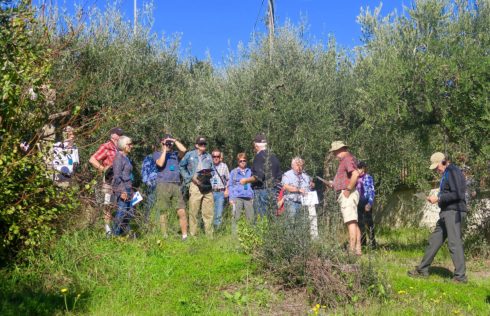
Phil Craig, our tour interpretive expert, leads us away from the crossroads and into an olive grove where he proceeds to tell us the story of what happened at a place known only as The Gully. First he directs our attention southward where a vineyard runs steeply down (much more so than this photograph depicts) to a line of trees and then more sharply down to the bottom of – a gully. Notice the houses on the opposite side of the gully that are at a higher than the elevation we’re standing on. Also, remember that the trees back then would have long since blasted away so between that farmhouse and where I am standing there would have been virtually no cover. Now extrapolate this picture for miles in each direction and you have a good idea of what a formidable obstacle the Canadians faced in trying to get from that farmhouse over there to where I took this picture, over here.
Gathered around in this bucolic setting, Phil tells us the story of a horrific week in Canadian history when an untried commander reverted to discredited WWI tactics that produced no tangible results. You can get the details by clicking on The Gully link.
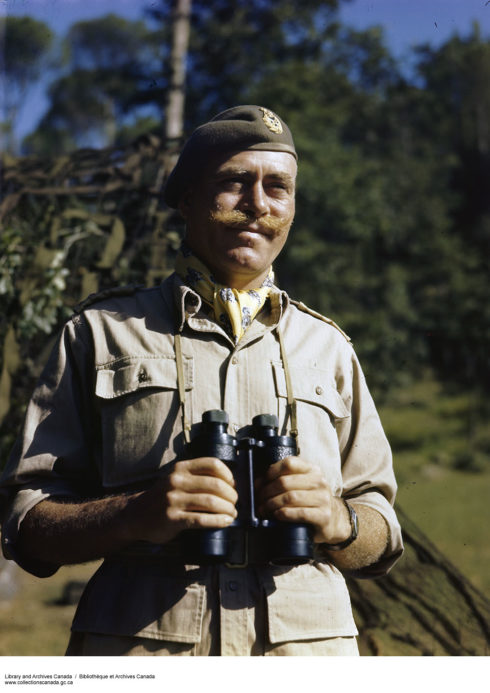
The long story short is that Major-General Chris Vokes had just been handed his first military command as he succeeded Guy Symonds as head of the 1st Canadian Infantry Division. Vokes is a controversial figure who was often derided for his unconcealed attempts to do everything he could to come off like ‘Monty’, right down to the swagger stick. From this photo, that’s easy to imagine.
Vokes thought the way to cross The Gully was simply to charge it. Vokes’ command consisted of three brigades which in turn were each comprised of three regiments. 1st Brigade was composed of the Royal Canadian Regiment (RCRs), the Hastings and Prince Edward Regiment (Hasty Ps) and the 48th Highlanders. 2nd Brigade was composed of Princess Patricia’s Canadian Light Infantry (PPCLIs), The Seaforth Highlanders of Canada (Seaforths) and the Loyal Edmonton Regiment (Loyal Eddies). 3rd Brigade was composed of the Royal 22e Regiment (Van Doos), the Carleton and York Regiment (CYR) and the West Nova Scotia Regiment (West Novas). We’ve come across all of these before and each has played a significant role in the Italian campaign so far – all have won battle honours. Let’s see what Major-General Vokes does to them at The Gully.
By December 10 efforts to capture Cider Crossroads and the back door into Ortona seemed to be going nowhere. Ist and 2nd Brigades had handled most of the fighting and the 3rd Brigade were in reserve. Vokes decided to use that tried and untrue tactic from WWI – when all else fails, try it again. He committed his reserves.
First up were the West Novas who were offered little artillery support because the terrain made it next to impossible to do any good. The West Novas suffered 60 killed and wounded and then just dug in to await further orders. Next day they were ordered to try again. Same result. Then the CYR were sent in, took 52 casualties and 28 men captured. Nothing gained. By now it was starting to dawn on Vokes that maybe the way to secure The Gully was simply to go around it and serious efforts to capture Casa Berardi, which we’ll visit next, had begun. However, did that stop Vokes from ordering more senseless head on assaults? To quote John Belushi, “But Noooo!”
All told, there were eight of these WWI type suicidal attacks. They finally wrapped on December 19 with the disastrous Orange Blossom plan in which Lt. Mitch Sterlin was killed. Everyone one of Vokes nine Regiments except the Van Doos received a battle honour for their efforts at The Gully. The reason the Van Doos didn’t will become apparent shortly as they went on to win a Victoria Cross at Casa Berardi.
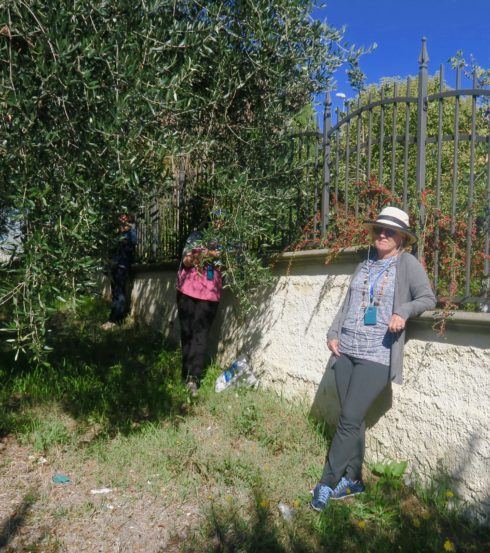
The more that Phil related the senseless slaughter at The Gully the madder I got. By the time he got to the 48th Highlanders I had to walk away to calm down. Alison took it a little better.
I had a reason to dislike Vokes long before I knew about his folly at The Gully. He was the one who commuted the death sentence of the infamous Kurt Meyer who ordered the murder of dozens of Nova Scotians at Abbaye D’Ardenne in Normandy. You can read my post about it here. Vokes apparently didn’t mind killing his own men, but not a senior brother officer from the other side, no matter what he did. Bastard!
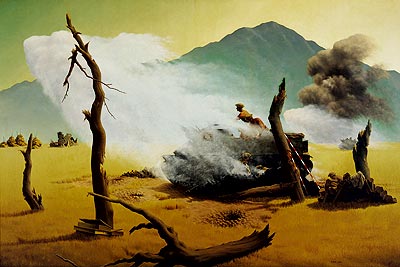
Before leaving The Gully have a look at this eerily beautiful hellscape by Lawren P. Harris, son of the Group of Seven artist, Lawren Harris. It seems to be a combination of his father’s abstract realism (not an oxymoron) and Salvador Dali’s surrealism.
Casa Berardi
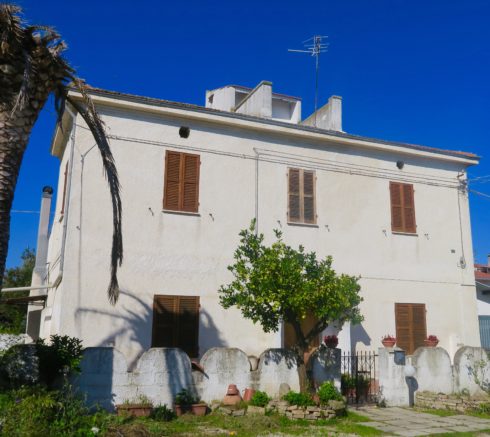
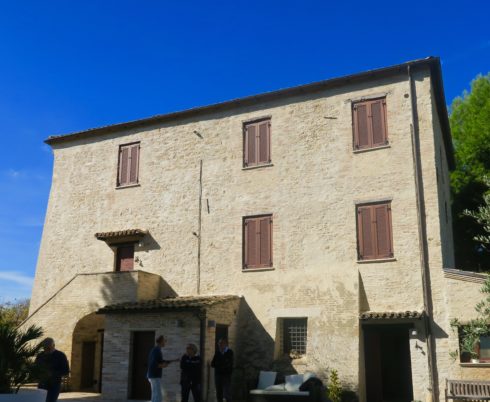
If The Gully was, literally a bloody disaster, then Casa Berardi, which occurred at roughly the same time, was a bloody success. Look at the detailed map above to find Casa Berardi. You’ll see that it sits on the other side of The Gully which continues westward for almost another mile. Then look for the pink arrow indicating the route that the Royal 22e Regiment (Van Doos) took around The Gully and then up the road to Ortona capturing the villa of Casa Berardi along the way. Sounds easy enough. All they had to do was go down and then up some of the steepest terrain in the area, evict the Germans from Casa Berardi and then hold in the face of some of the fiercest counter attacks of the Italian campaign. We are headed there now to hear the story of how this group of heroic Quebecois earned a Victoria Cross for their efforts.
This is Casa Berardi today, not looking too much worse for wear, despite the events of December 14-15, 1943.
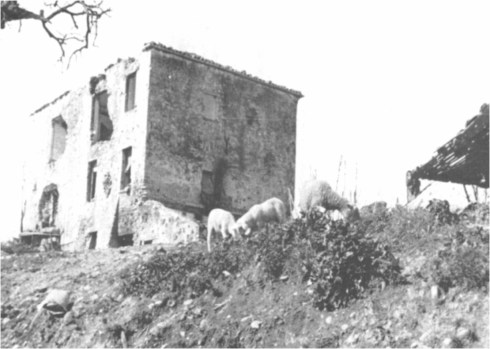
This is what it looked like then.
By the third day of heavy losses trying to cross The Gully head on, Vokes finally realized, or more likely one of his staff, that maybe trying to go around the obstacle would be a better option. On the morning of December 14 the Van Doos, possibly relieved at knowing they wouldn’t be one of the regiments charging The Gully, headed out along with the Ontario Tank Regiment. What ensued was a furious battle that saw almost all the Van Doo officers killed and the force reduced to less than twenty men under the command of Lt. Paul Triquet. His actions that day and over the next night earned him the Victoria Cross. I’ll let the Citation tell the rest of the story.
For determined leadership and example.
The capture of the key road junction on the main Ortona-Orsogna lateral was entirely dependent on securing the hamlet of Casa Berardi. Both this and a gully in front of it had been turned by the Germans into formidable strong points defended by infantry and tanks.
On 14th December, 1943, Captain Triquet’s company of the Royal 22e Regiment with the support of a squadron of a Canadian Armoured Regiment was given the task of crossing the gully and securing Casa Berardi. Difficulties were encountered from the outset. The gully was held in strength and on approaching it the force came under extremely heavy fire from machine guns and mortars. All the company officers and 50 per cent of the men were killed or wounded. Showing superb contempt for the enemy Captain Triquet went round reorganizing the remainder and encouraging them with the words ‘Never mind them, they can’t shoot’. Finally when enemy infiltration was observed on all sides shouting ‘There are enemy in front of us, behind us and on our flanks, there is only one safe place – that is on the objective’ he dashed forward and with his men following him, broke through the enemy resistance. In this action four tanks were destroyed and several enemy machine gun posts silenced.
Against the most bitter and determined defence and under heavy fire Captain Triquet and his company, in close co-operation with the tanks forced their way on until a position was reached on the outskirts of Casa Berardi. By this time the strength of the company was reduced to 2 sergeants and 15 men. In expectation of a counter-attack Captain Triquet at once set about organizing his handful of men into a defensive perimeter around the remaining tanks and passed the ‘mot d’ordre. Ils ne passeront pas’.
A fierce German counter-attack supported by tanks developed almost immediately. Captain Triquet, ignoring the heavy fire, was everywhere encouraging his men and directing the defence and by using whatever weapons were to hand personally accounted for several of the enemy. This and subsequent attacks were beaten off with heavy losses and Captain Triquet and his small force held out against overwhelming odds until the remainder of the battalion took Casa Berardi and relieved them the next day.
Throughout the whole of this engagement Captain Triquet showed the most magnificent courage and cheerfulness under heavy fire. Wherever the action was hottest he was to be seen shouting encouragement to his men and organizing the defence. His utter disregard of danger, his cheerfulness and tireless devotion to duty were a constant source of inspiration to them. His tactical skill and superb leadership enabled them, although reduced by casualties to a mere handful, to continue their advance against bitter resistance and to hold their gains against determined counter-attacks. It was due to him that Casa Berardi was captured and the way opened for the attack on the vital road junction.
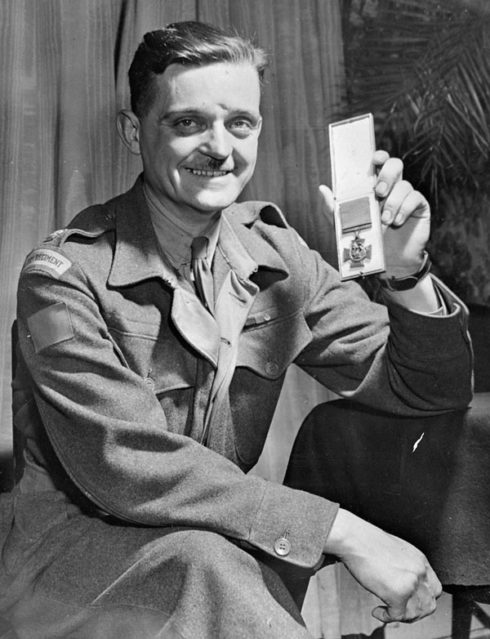
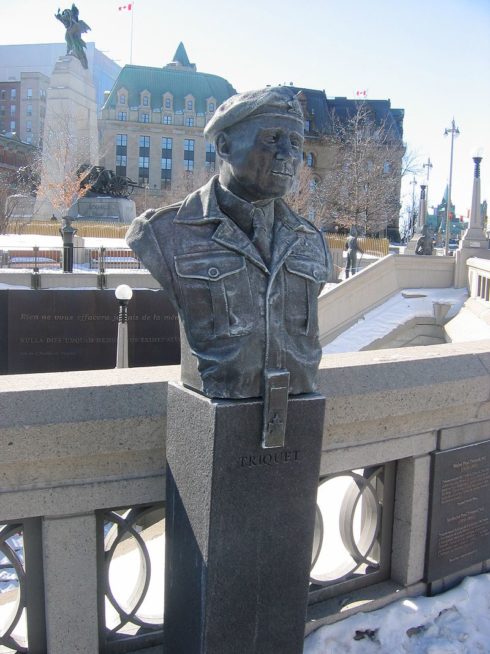
Ils ne passeront pas translates as They shall not pass, and it was not first uttered by Lt. Triquet, but rather by Marshal Petain at Verdun in WWI. Later, Triquet said it was not he, but someone else who shouted out the rallying cry, but nobody listened. Whoever said it, it meant the Germans were only getting through over Lt. Triquet’s dead body and those of his men. They didn’t. Here is Lt. Triquet with his VC, looking a lot more humble than the buffoon Vokes.
Lt. Triquet has also been honoured with this bust near the mouth of the Rideau Canal in Ottawa. Appropriately the Canadian War Memorial is in the background.
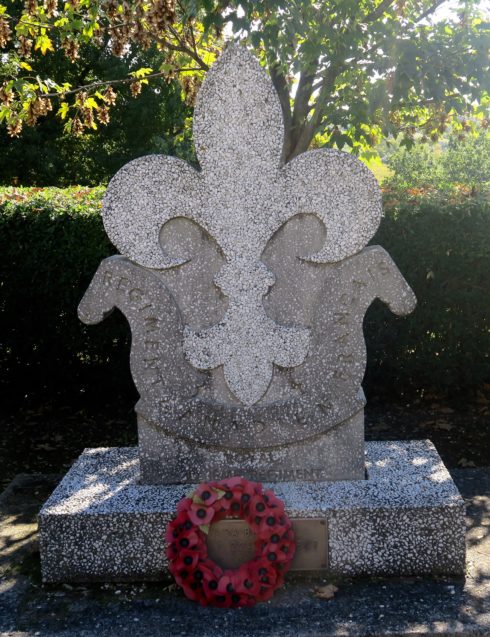
On the ground at Casa Berardi is this monument to the Van Doos. It’s good to see that it honours all members of the regiment who fought here over those two days and not just Triquet. As Phil explained later at lunch, Triquet was bothered his whole life with the burden of being a genuine Quebecois hero and repeatedly trotted out as such before Anglophone audiences to prove that Quebecers were not shirkers. He felt that he had done no more than the other men who had undergone the Casa Berardi ordeal. Some say it ruined his life, leading to the breakdown of his marriage and alcoholism, but that was the fate many thousands of Canadian veterans and they were not VC winners.
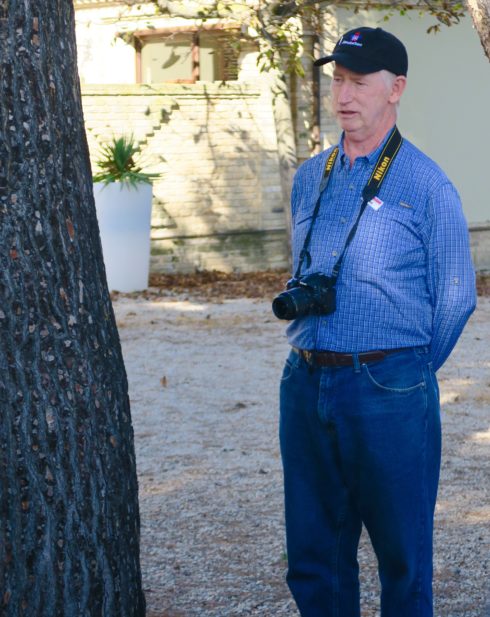
One of the members of our group was David Smith whose father Norman was in action at Casa Berardi with the Ontario Tank Regiment and David related to us the very little that his father ever talked about his experience here. That is in keeping with what I ever got out of my father, uncle and grandfather about their war time experiences. Veterans who have engaged in deadly combat seldom like to talk about it.
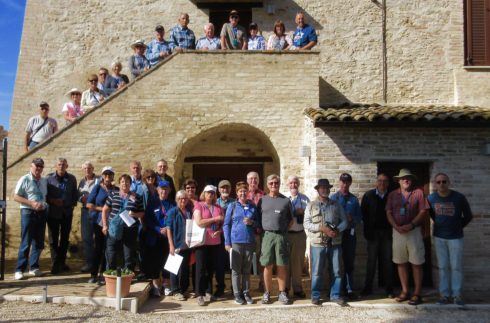
We ended our visit to Casa Berardi and the Moro River battle sites with this group photo. The two men flanking Mark in the Tilley hat on the right of the photograph are the current owners of Casa Berardi which you can rent as a holiday villa, (I can’t help but think that it must be haunted). They were kind enough to set out a wine and cheese spread featuring their own wines and local cheese. Yet another example of the fact that the Italians have not forgotten what Canadians sacrificed for them in WWII.
After the photo we reboarded the bus and headed for Ortona.
Please join me for the next post from Ortona.